Thursday 18 December 2014

Pineapple and coconut cake

Oh boy I'm late writing this one up, but here goes.

Last week I walked into my parents kitchen. "Pineapple and coconut cake" dad barks at me.
"What?"
"Pineapple and coconut cake"
"What about it?"
"I want you to make me one"
"Ok, for when"
"Now"


So polite! But as I was already baking that afternoon and he had dessicated coconut and a tin of pineapple in the cupboard, I obliged. I rarely say no to baking or being told to bake.

The politeness continued when I returned a few hours later with a pineapple and coconut cake in hand. This time from my mother. "Oh! It doesn't look like I thought it would. I thought it would be with icing in the middle and on top." She's an icing fiend.

Apparently there were further instructions on what was required! Realising she shouldn't have said that, my mother apologised and gave me a hug. "Wait and see I said, just wait and see".

And do you know what? They soon shut up with their gobs full of cake. "Oooo this is yummy, much better than an iced filled cake".

Why thank you! 

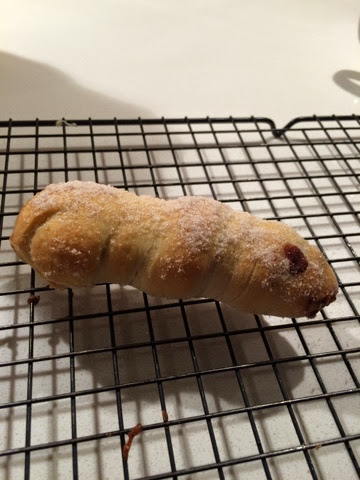
There's no looks in this cake, it's simply cake with a dusting of icing sugar, but it's all in the taste. If you like pineapple and you like coconut you'll love this cake. Apparently it's lush with custard too as my mum found out later that night on her second helping.

So if you fancy baking a tasty cake with minimal effort, this is the cake for you!

Pineapple and coconut cake:
110g butter/Stork
110g caster sugar
2 eggs 
250ml sour cream
200g self raising flour 
1/4 tsp bicarbonate of soda 
150g dessicated coconut
200g tinned pineapple cut into chunks (drained weight)

Preheat the oven to 180/160c fan. Line a 7"/18cm tin.

Cream the butter and sugar together until light and fluffy. Beat in the eggs then the sour cream.


Add the flour and bicarbonate to combine the mix together then lastly fold through the coconut and pineapple. 


Spoon into the tin (it's quite thick) and bake for 60-75 minutes until a skewer comes out clean. 


If it's colouring too much, pop a little tin foil hat over the cake to continue cooking. 

Leave to cool then dust with icing sugar or serve warm with custard.

Like I said, it's not about looks!


Monday 15 December 2014

Ecclefechan tarts

I was standing in Sainsburys a few weeks back, perusing the mince pies, when I came across some Ecclefechan tarts. Huh? What? I'd never heard of them before so put them back.

The next week I came across a recipe for them, then another. So I looked into them a little more and decided that it was something I had to bake this Christmas. And today was the day.

I guess they're kind of like a mince pie, they're full of festive flavour and dried fruits, yet they're a little different. Definitely a nice alternative to a mince pie. 

Making your own pastry is a must in my house. You can cheat of course and use shortcrust or puff pastry. The pastry here is more a cross of the two. It's lovely pastry indeed so I do urge you to try and make it yourself. It's not difficult if you have a food processor and you won't be disappointed with the results.

Look at it! Mmmmmm flaky and short 


Pastry:
225g plain flour 
100g unsalted butter, cold and diced
25g caster sugar 
Zest of one orange 
1 egg
A little cold water

Filling:
2 tbsp treacle
150g dark brown sugar 
1 tbsp vinegar 
125g butter
1 1/2 tsp mixed spice
90g currants
80g raisins
30g dried cranberries 
50g glacé cherries (halved)
50g flaked almonds 
2 eggs 

Makes 24
2 pastry tart/cupcake tins

In a large heavy bottomed pan, gently melt together the syrup, sugar, vinegar, butter and mixed spice. Once the butter has melted and all ingredients incorporated take off the heat and add the dried fruit and nuts. Leave to cool on the side.


To make the pastry, start by putting the flour and butter into the food processor and pulse until it resembles crumble. Add the sugar and zest and mix to combine then mix in the egg and enough cold water so it comes together. Be careful not to add too much liquid. Bring together, roll into a ball and chill for 30 minutes.

Once your filling has cooled to room temperature, preheat the oven to 200/180 fan. Beat the two eggs into the filling mixture. Take the pastry from the fridge and roll out on a lightly floured surface. Use a cutter larger than the recess in the tin so once you pop the pastry disc in, it comes to the top of the sides. Fill each case with one large teaspoon of filling. Bake for 12-15 minutes until the pastry is turning golden. Leave to cool in the tin for 5 minutes before leaving to finish cooling on a wire rack. I only have one tin so reused it after 5 minutes but you could leave them to cool completely in the tin.

My first batch didn't look the best in that the filling was escaping the pastry over the top. 

This was too much: 

For the second batch I put a little less filling in but still had a few go over the side. Once you've sprinkled over some icing sugar you can hardly tell. I think!


Sunday 14 December 2014

Christmas cake. Again!

This year's Christmas cake is the exact same recipe as last year's so I won't rewrite the whole recipe again. But you can find it here: http://mahhattersteaparty.blogspot.co.uk/2013/12/oh-weather-outside-is.html?m=1

I did change the tins this year though and the recipe was enough to make a round 9" cake and medium muffin sized cake.

If you have a square 9" cake then that would be perfect!

Despite pinning lots of lovely ideas to decorate a cake, I simply couldn't be bothered to do any of them. I had some red fondant and some leftover sugar snowflakes so squashed them on top instead. Ha no prizes for decoration but it's all in the taste right? 

Well if it tastes as good as it smells it's going to be a winner! 

I don't cover the whole cake as my family aren't marzipan and fondant fans. Look at that cheeky marzipan peeping through.

Merry Christmas!


Wednesday 10 December 2014

Rudolph the red nose gingerbread

I decided I needed to bake something festive given it's only 15 sleeps until Christmas 

Unfortunately I'm back on my diet and every other month of the year, I'll bake with gusto. December however is a different kettle of fish for me as it's that special month where I like to indulge and I absolutely love the festive flavours too so it's a double whammy of misery for me this week. That aside, I'm not one to deny others so today I've been back in the kitchen baking not one, but two things.

This blog post will concentrate on my rudolph biscuits. I decided on these as I watched a 3 year old munch into a gingerbread reindeer from the bakers at 9am this morning. My boys love gingerbread men so I thought it'd be fun to use a gingerbread man cutter and recreate the rudolph I saw this morning. Like this: 


But as I trawled Google images I found this little beauty. Oh my! 


That's one for another day however so once I came across these little cuties I abandoned the upside down gingerbread man and settled on these. 


The bonus being we have loads of M&Ms in the house.

I used the same gingerbread dough recipe as I used to make my gingerbread house last year which is as follows:

350g plain flour
1 tsp bicarbonate of soda 
2 tsp ground ginger 
1 tsp ground cinnamon 
125g butter 
175g light brown sugar
1 egg
4 tbsp golden syrup

Get the food processor out and pulse together the flour, bicarbonate, ginger, cinnamon and butter until the mix resembles crumble. 


Add the sugar and pulse. Then add the egg and golden syrup. It will start to clump together a little. Turn out and knead into a ball. 

Trust me it will come together!


Pop in cling film in the fridge to rest for 15 minutes. Meanwhile preheat the oven to 190/170 fan.

Dust the surface with flour and roll out the gingerbread until it's about 5mm thick. Use a round cutter (mine was 7.5cm) to cut out rounds and transfer to baking sheets. Bake for 10 minutes until turning golden then remove from the oven and using a fish slice, remove carefully as they're still quite soft, onto a cooling rack. They'll harden on cooling.you could leave on the baking trays to harden but I needed them to make the next batch.


Once cooled, get your noses ready and melt 40g chocolate. 


I used a number 2 icing tip and icing bag. Fill it with the chocolate then pipe the antlers, eyes and add a blob of chocolate for the nose then pop an M&M on. Let the chocolate harden then eat or bag up and give away as gifts.

Rudolph the red nose gingerbread!


Saturday 6 December 2014

Chocolate snowballs

So the second thing I chose to make for my son's school Christmas fair was these - Chocolate snowballs. What kids doesn't love a rice crispy cake?!

They're really easy to make just slightly more time consuming to achieve their shape but it's simple to do.

This recipe makes about 18

You need: 
50g rice crispies
30g chopped raisins 
50g butter
100g milk chocolate 
2tbsp crunchy peanut butter
30g mini marshmallows
80g milk chocolate to top
Edible Christmas decorations 

In a large bowl mix the rice crispies and raisins. 

In a small pan, gently heat the butter, chocolate, peanut butter and marshmallows until the chocolate has melted and the marshmallows are beginning to melt 

Pour over the rice crispies and raisins and mix to combine. To create the dome shape you need an egg cup. Line it with cling film and pop about a tablespoon of the mixture in and squash down. 


Gently pop out the dome and put into a cake case flat side down. The mixture is sticky enough to hold the shape. Repeat using the same piece of cling film. Once you've used up all the mixture, leave them to harden at room temperature or in the fridge. 


Melt the chocolate and dollop onto the top of each dome and top each one with an edible decoration. I found some white snowflakes but you could also use white chocolate and top with mini holly leaves 


Friday 5 December 2014

Gingerbread and white choc cream cupcakes

I was trying to choose something for my son's school Christmas fair that would go down well and be festive and tasty.

I'm a sucker for ginger and gingerbread so a gingerbread cupcake was something I just had to try. They're a ginger cake with a white chocolate cream on top. I hope they went down well. Half were gone by the time I saw them so fingers crossed people enjoyed them. I originally wanted to buy this plunger to top them with a little gingerbread man but I'd left it too late to order and it'd sold out. But I got my hands on some gingerbread man sprinkles which were perfect.


Unfortunately I dropped the box on the way to school. Luckily it had a lid on so they were still edible and it's a good job the frosting sets quite firm as that really helped the damage control. The receptionist assured me they still looked great 

If you fancy having a go then here's the recipe:
200g stork
200g dark muscovado sugar
4 eggs
1 tbsp treacle
1 tbsp golden syrup 
200g self raising flour 
1 tsp cinnamon
5 tsp ground ginger (yes 5!)
5 pieces of stem ginger (chopped)

100ml double cream
100g white chocolate 
100g unsalted butter
200g icing sugar 

Preheat oven to 170/150 fan and pop your muffin cases into a muffin tin.

Beat the margarine and sugar for 5 minutes until lighter in colour and fluffy. 


Add two eggs and mix well then add half the flour and mix. Add the last two eggs and the flour, ginger and cinnamon, treacle and syrup.


Spoon into the cases then sprinkle the stem ginger into each dollop of mixture.


Bake for 25-30 minutes until a cake tester comes out clean and leave to cool ready for frosting.


To make the frosting, gently heat the double cream in a small pan and once it begins to bubble, take off the heat and add the white chocolate. In another bowl beat together the icing sugar and butter until fluffy. Once the cream and chocolate mix has cooled to body temperature (it doesn't take long), mix into the icing sugar/butter mixture and whisk until it stiffens slightly. Pipe or dollop onto your cooled cupcakes and top with sprinkles, ground ginger, stem ginger, chocolate flakes......whatever you want 

Christmas in a cupcake!


Sunday 2 November 2014

Cinnamon pretzel twixes

I follow a Facebook page/website called Iced Jems and I've baked a few of her recipes including this one yesterday.

Now I shouldn't be eating these but once I'd cut into one to take a photo, I just had to have a nibble

Epic is the word!!!

I didn't expect them to be as nice as this so I'm sharing the recipe and then I can make them again. I'm also thinking what else could be used in place of a twix so if you have a suggestion, let me know and I might try it next time

So here goes
To make 8

Ingredients 
185ml warm water 
1 1/2 tsp sugar
1 tsp rock salt 
1/2 7g pack of dried yeast
10oz / 225g plain flour
1oz / 27g butter
8 single twixes
1oz / 27 g melted butter
50g caster sugar
1 tsp cinnamon

Pop the twixes into the freezer. Pour the water into a large bowl (I used my kitchen aid bowl with dough hook) and add the salt, sugar and sprinkle over the yeast. Don't stir and leave to do it's stuff for 5 minutes. It will start to froth up a bit


Melt the butter then tip into the yeast mix with the flour and mix together for a couple of minutes with a dough hook (or by hand). It should be fairly sticky. Bring together into a ball and place in a clean bowl covered with cling film to prove for an hour.


Preheat the oven to 180 fan /160c. Once proved, take small handfuls of the dough and roll out on a floured surface to about the thickness of a twix but about 3.5/4 times the length. 


Remove the twixes from the freezer and wrap in the dough. I found it easier to make a little hat for the twix with one end of the dough then wrap round. You need to ensure there are no holes or the twix will escape!


Once wrapped they look a bit cocoon like. Place on two baking trays and lightly brush with melted butter then bake for 10-15 minutes. Meanwhile mix the sugar and cinnamon together and spread out in a plate. 


They should be lightly golden once baked and when you tap the bottom they should sound hollow. Leave to cool for ten minutes on a wire rack then lightly brush with more butter and roll in the cinnamon sugar 


They're best eaten straight away while slightly warm or if you manage to save them for later just pop in the microwave for 10-20 seconds 

Oh
My!


Original recipe courtesy of Iced Jems
http://www.icedjems.com/2014/09/cinnamon-pretzel-twixes/