Wednesday 25 April 2018

White choc chunk blondies

Well hello there!

I can’t believe it’s almost two years since I’ve done a blog post. So why am I doing another one after so long? Well in the last two years I’ve continued baking but not documented it and during that time there’s things I’ve made and enjoyed but didn’t keep note of which recipe I’ve used and so when I come to bake it again, I’ve no idea where to start.

Today I decided therefore it was time to take this up again for my own records and if I gain a few followers back or people who recreate my recipes then bonus.

So why start back with blondies? Well they’re something I made a few years ago but they didn’t turn out too well. A few weeks back they were a bake on Stand Up To Cancer GBBO and they pretty much include store cupboard staples for me. I’ve been meaning to bake them since then but just for one reason or another haven’t. But here they are!

There’s many different recipes out there so I came across a few I thought would bake well. I want them to be squidgy like a brownie, not too dense, but not fluffy like a cake. Here I’ve used white chocolate chunks but this recipe would be epic with Nutella swirled in, any other chocolate chips and even some biscoff spread. Probably any spread would work swirled into it as well as nuts. Watch this space for future alternatives!

The best bit about blondies? They’re made in one bowl!

You’ll need an 8”x8” square tin lined with baking parchment. Preheat the oven to 180/160c fan.

Ingredients:
115g melted butter
175g light brown sugar
40g dark brown sugar
1 egg
1 tsp vanilla extract
Pinch of salt
130g plain flour

100g white chocolate chunks

In a large pan or bowl mix together the melted butter and sugars until combined. Mix in the egg until completely combined along with the vanilla and salt. Add the flour and give it a good beating until the thick mixture looks like it pulls away from the sides of the pan or bowl then add in the chocolate chunks.

Pour into the prepared tin, level out and bake for around 20 minutes until the top looks just cooked and a cake tester comes out mainly clean but with a bit of cooked batter on it. Be careful not to under or overbake!

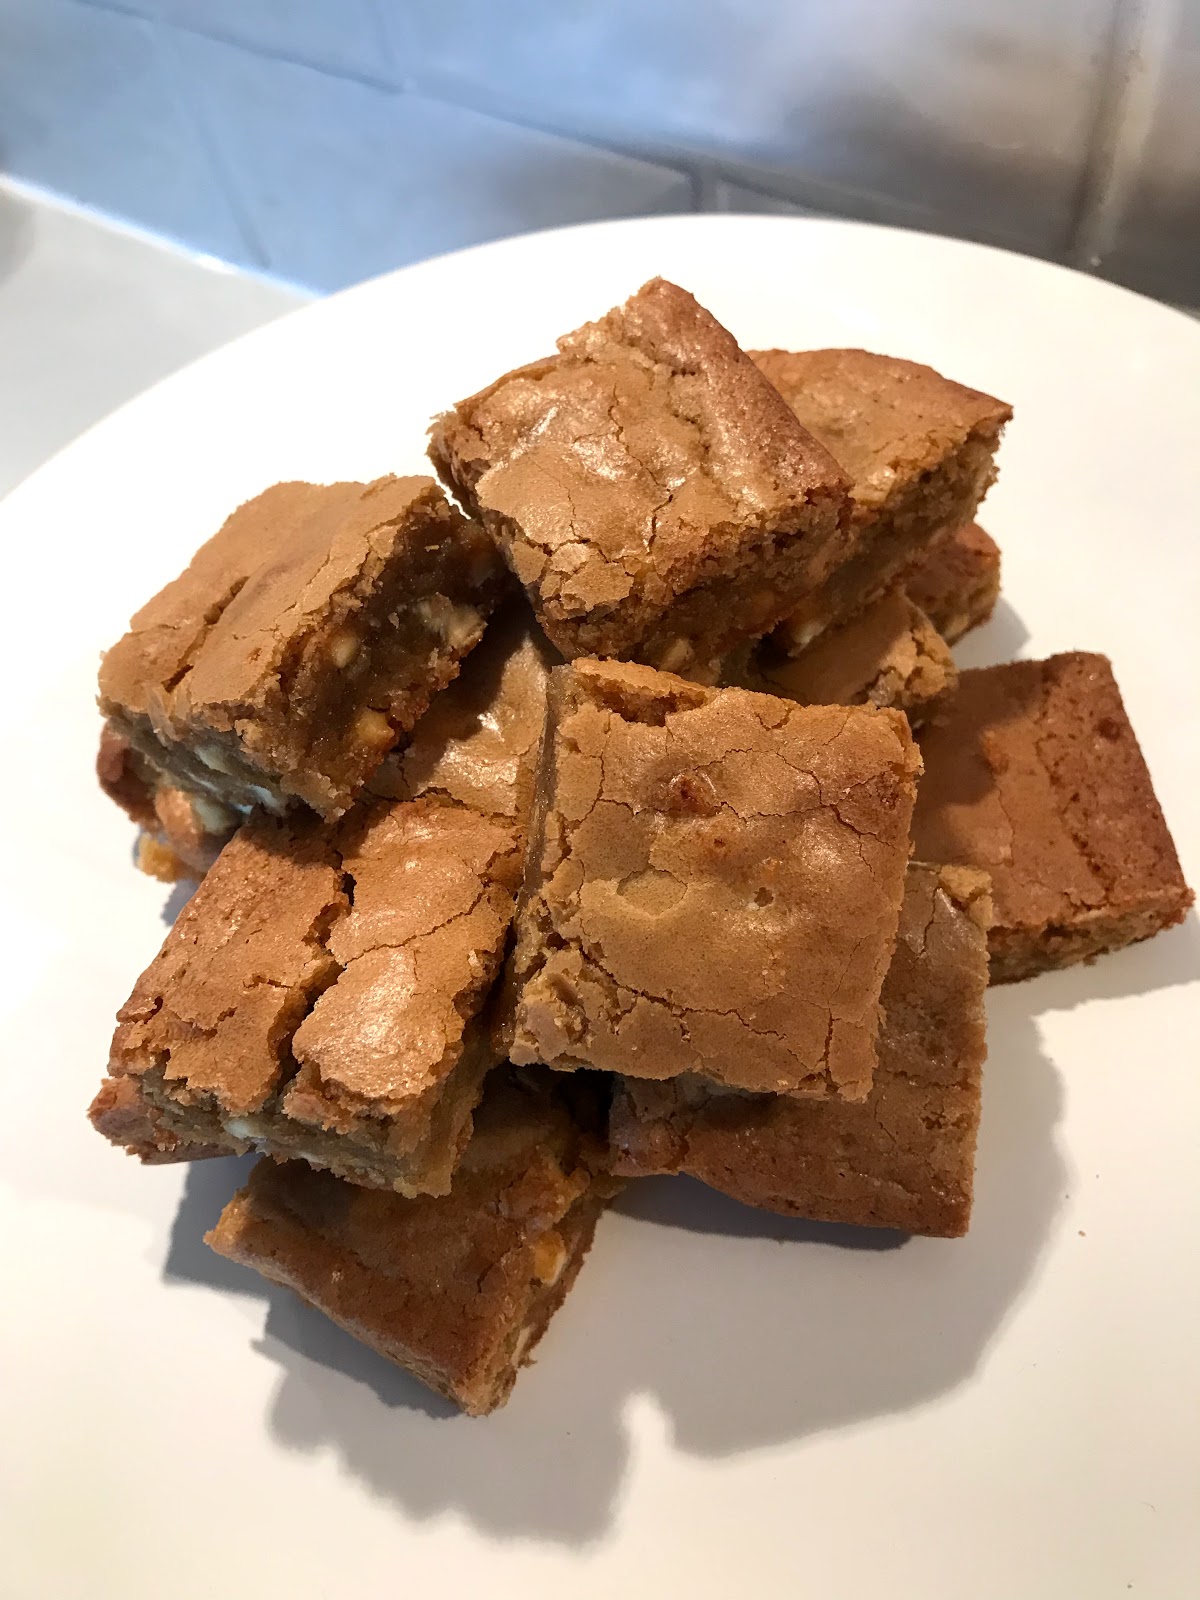
Leave to cool in the tin then cut into squares as small or as big as you want! I got 12 small squares from mine, not really big enough in my greedy opinion!

Enjoy and let me know what you think

Tuesday 16 August 2016

Chocolate & Vanilla Pinwheel Swirl Biscuits

I love the baking community on Twitter and with the imminent start of the Great British Bake Off a couple of baking aficionados have got together to organise the #GBBOTwitterBakeAlong

Every week a theme is being chosen and this week is biscuits. Anyone who takes part has one week to bake biscuits and post their creations.

Now I used to bake biscuits a lot but have got out of the habit of doing this. However I am a big biscuit fan. I don't actually even eat them often as they're too dangerous, but present me with a soft bake cookie and I go very very weak at the knees. In fact I know I wouldn't be this overweight if cookies didn't exist in this world.

But I didn't want to bake cookies so I did my usual Pinterest research and came across the vanilla and chocolate swirl cookies. I am adamant these were a common dessert at my primary school, served as pudding dowsed in custard. Anyone else remember them or was it just my school that did these and passed it off as pudding?!

I have just made my first batch assuming my eldest wouldn't like them but my youngest (who is a butter, sugar, biscuit fiend) would love them. But to my surprise it's the other way round. I would never have guessed, but my youngest took one teeny bite and declared "yuck". I obviously had to consume the rest of the biscuit to see what could possibly be wrong. And do you know what is wrong with them? Nothing, absolutely nothing. In fact just the opposite, I thought they were delicious. As does my eldest who said that I am the best biscuit maker ever and has now consumed two more.

So I present you with this recipe and I say go forth and BAKE!

This recipes yields approx 17-18 biscuits.

115g soft unsalted butter plus a little extra
100g caster sugar
1 egg yolk
2tsp vanilla extract
1tbsp milk
200g plain flour
1tsp baking powder

In addition you will need 20g unsweetened cocoa mixed with 15g butter and 1tbsp milk. Melt the milk and butter together, stir in the cocoa and set to one side.

Cream the butter and sugar until light and fluffy. Add the egg yolk and vanilla extract and beat in to the mixture followed by the milk. Sieve in the flour with the baking powder on a slow speed then increase to a medium speed, mixing until the dough comes together.

Divide the dough by removing around 2/3rds of the mixture and set aside. This will be the vanilla dough. To the remaining dough, add the chocolate mixture you made at the start and beat until it is fully incorporated. This is your chocolate dough.

Using baking or greaseproof paper, roll out the vanilla dough into a rectangle around 20cm wide by 25cm long. Do this with the chocolate dough on another piece of greaseproof paper then delicately lay them on top of each other.  With the short end facing you, gently roll the dough quite tightly but without flattening as you go, into a log. Wrap in clingfilm and put into the fridge to chill down for at least 30 minutes.


If making ahead you can put this dough into the freezer and then just cut slices off as and when you want a biscuit fix!


Ready to bake? Preheat oven to 180c fan/160c. When you take the dough out of the fridge give it a little roll so it goes back into a nice round shape as it can sag a little in the fridge during cooling. Slice 0.8mm-1cm rounds with a sharp knife and place on a baking sheet leaving room around each biscuit as they do grow when baking. They will be done when just starting to brown and feeling a little harder to the touch. If they are still too soft pop back in for longer. Then remove and cool on a wire rack.

Custard (as per my primary school) optional!


Friday 29 July 2016

Blueberry and Curd Muffins with Streusel Top

On a dreary summer's day when my mum asks, "fancy baking something?" who am I to say no. My mother doesn't have quite as many baking staples as I have but I managed to clobber together some basic ingredients in a fashion to come up with these muffins. And luckily she had some blueberries that needed eating.

Now I have to confess they haven't turned out perfect and look a bit flat on top but that's because I was substituting a few ingredients (no butter, only a bit of stork left so where butter and stork were required I had to use anchor spreadable plus she also didn't have enough caster sugar so it's a mix of different sugars). The recipe below includes the correct ingredients and I will repeat this recipe soon to remake these (as I also have half a jar of the yummy curd left).

Onto the curd..........at the back of the cupboard, and, surprisingly still in date, I came across a jar of three fruit curd from Chatsworth. The three fruits being lemon, lime and mandarin. Now of course normal curd will suffice but if you can get your hands on a slightly different curd or a curd with mixed fruits, then that would be great. Lemon of course compliments blueberries really well anyway so if that's all you can get, then perfect.

I decided that a streusel topping would go really nice with these. A what? Streusel top I say. It's actually pretty much a crumble. Mmmmm crumble on cake! Unfortunately not having proper butter meant it didn't really work, so you definitely need proper butter, but they add an extra something to them.

Despite there being curd in the batter, I also decided to add a small dollop into the middle of the buns too for that extra fruity hit.

So they may have not turned out perfect this time and the streusel top mainly melted into the batter due to the wrong fat being used, but it didn't stop my dad from demolishing too with cream when he came home from work this evening. Best served warm and eaten on a plate with cream as they are quite delicate and burst with lots of yummy oozy fruit and curd.

Make and enjoy!

Ingredients:
Streusel top:
25g plain flour
85g demerara sugar
50g cold butter

Muffin mix:
175g stork
175g golden caster sugar
200g self-raising flour
100ml greek yogurt
2tbsps curd (lemon or any flavour mix you like)
3 eggs
100g blueberries

Pre-heat oven to 180c fan / 160c. Line a muffin tin with 12 muffin cases.

Start by making the streusel mix. Add all the ingredients to a bowl and mix together to form a crumble with bits of butter still visible. Place in the fridge until required.

In another bowl add the stork, sugar, flour, yogurt, curd and eggs and mix to form a batter. Be careful not to overmix. Dust the blueberries in a little flour, this helps prevent them from sinking during baking. Then pop a spoon of mixture into the base of each muffin case, add 4 blueberries on top of the batter along with a small dollop of curd. Then top each muffin with the remaining batter and add another 3 blueberries to each muffin top. Take the streusel topping out of the fridge and crumble on top of each cake.

Bake in the pre-heated oven for 20 minutes.


Monday 8 February 2016

Scones but not as you would think

When I came across a video for scones made with just three ingredients, one of which being lemonade, I was mesmerised at how they had turned out and just knew I had to have a go. Apparently I am quite slow when it comes to this method as it's become a popular method over the years.


I love to bake scones and do so fairly regularly as they are a favourite of my dad's. I always use the same Delia Smith recipe and when I have veered off this course to try other recipes, I have always come up a cropper. But this video just looked so amazing that I decided it was worth trying. I've decided even an idiot could make these, they really are that simple.

As with traditional scone recipes it's the dough you need to be careful with. Really do ensure you don't overwork it.

So my thoughts on these scones. Well you can't taste the lemonade, maybe a teeny tiny hint but not as much as you would anticipate with it being one of the key ingredients. To me they rose majestically and were cooked through, but they aren't as sweet as I am used to. When you add jam and cream then that's not an issue but if you just have them with butter, you can tell they are missing the sweetness. Which is  random as there's again all that lemonade in them. I think I will try this recipe again with a bit of caster sugar added too, so watch this space. Or keep the recipe as is and make them savoury scones by adding cheese and bacon etc.

However I do think this will overtake my Delia recipe I have clung on to for 20 years to become my go to method of making them.

Have a go and let me know your thoughts!

Ingredients:
4 cups self raising flour
300ml double cream
300ml lemonade.

Put the flour in a large bowl and add the cream. Pour in the lemonade and watch it fizz. Using a metal knife gently combine the ingredients together then turn out on a floured surface and bring together. Do not overwork the dough, and flatten out either by hand or with a rolling pin (I used hand) to about 2cm thickness. Cut out rounds of the size you want and then bake on trays in an oven at 180c for around 12-15 minutes until golden on top and there's a hollow sound when you tap the bottoms. Cool on a wire rack and demolish.


This recipe makes around 12-20 scones depending on your cutter size.

These do need to be eaten preferably the same day. If they last that long!

Saturday 12 December 2015

Chocolate ginger fridge cake

A few months back I bought some crystallised stem ginger but still hadn't got around to using it yet. I saw it again in my baking drawer last week and noticed that it will soon go out of date. Ginger is a lovely warming spice this time of year so to use it in a bake in December is perfect. I came across this recipe from Good Food and I love fridge cake anyway, who doesn't?! But the addition of stem ginger plus the swap to ginger biscuits makes it totally different, but in a good way. A better way in my opinion.

Be warned though that if you don't like ginger biscuits or stem ginger then this definitely isn't for you. But as I love them both then this recipe is definitely in my top 10 favourite bakes. It may even be in my top 5!

Easy as pie to make, as are all fridge cakes, you can put this together quickly in the morning to serve up for tea time.

The ginger nut biscuits do take some effort to crush up, they're one of the hardest biscuits, so I recommend using a food processor and use the pulse button. You don't want fine crumbs, you definitely need some good chunky bits remaining.

Ingredients
300g ginger nut biscuits
300g dark chocolate
100g butter
100g golden syrup
140g crystallised stem ginger

Begin by lining an 8"x 8" baking tin with baking paper and get on with crushing the biscuits either by hand or in the food processor with the pulse button. Put into a large bowl. Chop up the stem ginger and add to the biscuits reserving some to put on the top of the finished fridge cake.

Put the chocolate, butter and golden syrup in a bowl set over a pan of gently simmering water and stir occasionally until the butter has melted and the mixture is smooth and glossy. Pour it over the biscuit and ginger pieces and mix together well with a wooden spoon.

Tip into the tin and flatten out the mixture to the edges. Top with the remaining stem ginger and pop into the fridge to set (at least 2 hours) then cut into pieces. How small or big they are depends on you!


Wednesday 9 December 2015

Mincemeat & White Choc Traybake

This recipe is perfect if you like the flavours of mincemeat but can't quite eat a full mince pie. This is much more subtle in taste than a mince pie but is still very festively apt at this time of year.

The recipe is by this year's GBBO winner Nadiya and I was surprised to see it's made with plain flour and no rising agents. But I stuck with it. It does produce a slightly denser cake but with the mincemeat I think it worked well being a bit denser than I'm used to.

Give it a go and see what you think. I think this will feature next Christmas too for sure!

Ingredients
225g soft brown sugar
225g unsalted butter
4 eggs
200g mincemeat
Zest of one large orange
2 tsp cinnamon powder
2 tsp nutmeg powder
200g plain flour
100g white chocolate
100g double cream

Preheat the oven to 190/170c fan. Line and grease an 8" x 8" tin or a tin around this size you can find.

Cream the butter and sugar for 5 minutes until the mixture is light and fluffy. Add the eggs one by one until well incorporated. Add the mincemeat and orange zest and mix well.

Sift the flour, cinnamon and nutmeg and add to the wet mixture. Mix well with a wooden spoon until combined. Spoon into the tin and smooth out to level the top off.

Bake for 25 minutes or until the skewer comes out clean. While its cooling get on with the ganache.

Break the chocolate into a bowl. Boil the cream, add to the bowl of chocolate and stir until everything is well combined and the mixture is glossy. It will thicken on cooling then spread on top of the cooled cake.

Cut into slices and serve


Thursday 3 December 2015

Christmas popcorn

Time to bake for my son's school Christmas fair and I've mulled over so many different ideas but while wrapping Christmas presents yesterday, I was watching Jamie Oliver and he was making Christmas popcorn. What a fab idea I decided.
I've not used anything like Jamie's recipe, which I'm sure is amazing and I've pinned to do another day, but I thought I'd have a go at my own recipe combining all my favourite Christmas spices.

I decided to use golden caster sugar as its a bit more caramelly than caster and dark brown sugar would be too much here. I also decided it would be fun to mix the popcorn up with Christmas edible sprinkles. You could choose whatever you wanted. And you don't need to stop there! You could add anything else in. Maybe so chocolate chips, dried cranberries or even some salty pretzel bits. The possibilities are endless.
I decided that it would look nice for the fair if I wrapped them up in sweet cone bags. I unfortunately don't have any nice ribbon in, but you could get some lovely Christmas ribbon and tie them up to give away as presents. This is one present I'd very much like to receive!

I made enough for 12 bags, so just half or quarter this quantity if you want to make it as a Christmas snack to munch on while you watch your favourite Christmas film.

Ingredients:
300g corn kernels
200g golden caster sugar
2 tsp mixed spice
1/2 tsp grated nutmeg
1/2 tsp cinnamon
1/4 tsp ground ginger
Edible sprinkles
Oil

First you need to prepare the sugar mix. Measure out the sugar and add the spices and mix together.

I make the popcorn in two batches: Get a large pan with a lid and add a tablespoon of oil. Put on a high heat and add 150g corn kernels. Shake in the oil then leave a few minutes until it starts to pop. Be patient, it will happen. Shake the pan every 20 seconds or so to ensure as many kernels pop as possible but don't leave on the heat too long or you'll burn the popped kernels. Just listen until the pops become less frequent. Be careful taking the lid off and then pour over half the sugar mix. Shake the pan, it's a great workout, so all the popcorn becomes coated then tip into a large bowl. The sugar will melt and caramelise around some of the popcorn.

Repeat the above step to cook the second batch of popcorn kernels.

Add the sprinkles or extras of your choice then either bag up or eat straight away. Some of the sugar and sprinkles will settle at the bottom of the bowl so share that out between the bags before you tie them up.

Christmas popcorn. I don't think it actually gets any better!